
Blog

How to Choose the Right Hinged Shower Door?

Choosing the right Hinged Shower Door is less about appearance and more about how the door behaves every day. It must open smoothly, seal reliably, and fit the room without interrupting movement. A bright bathroom can still feel cramped when the door swings into a towel rail or vanity.

Bathroom design consultant Laura Bennett offers a practical reminder: “Measure the opening, then respect the space around it.” Her advice reflects a common installation mistake. Homeowners often measure only the shower opening. They forget the door’s swing path, wall strength, handle clearance, and nearby fixtures.

Start with the shower’s actual dimensions. Check the width at the top, middle, and bottom. Walls are not always perfectly square. Small differences can affect alignment and water control. Then consider the hinge side. A left-opening door may work better in one bathroom, while a right-opening model may protect a narrow walkway.

Glass thickness, hinge quality, seals, and adjustment range also deserve attention. Frameless designs look clean, but they demand accurate installation. Semi-frameless options may offer more forgiveness. That detail matters.

Do not choose by style alone. A beautiful door can become frustrating if it drips onto the floor or requires excessive force. I have seen this happen after rushed renovations. The mistake was not the product. It was poor planning.

This guide explains how to compare configurations, materials, measurements, and installation requirements. It also questions a common assumption: the most expensive Hinged Shower Door is not automatically the best choice. Your room, habits, and maintenance expectations should lead the decision.
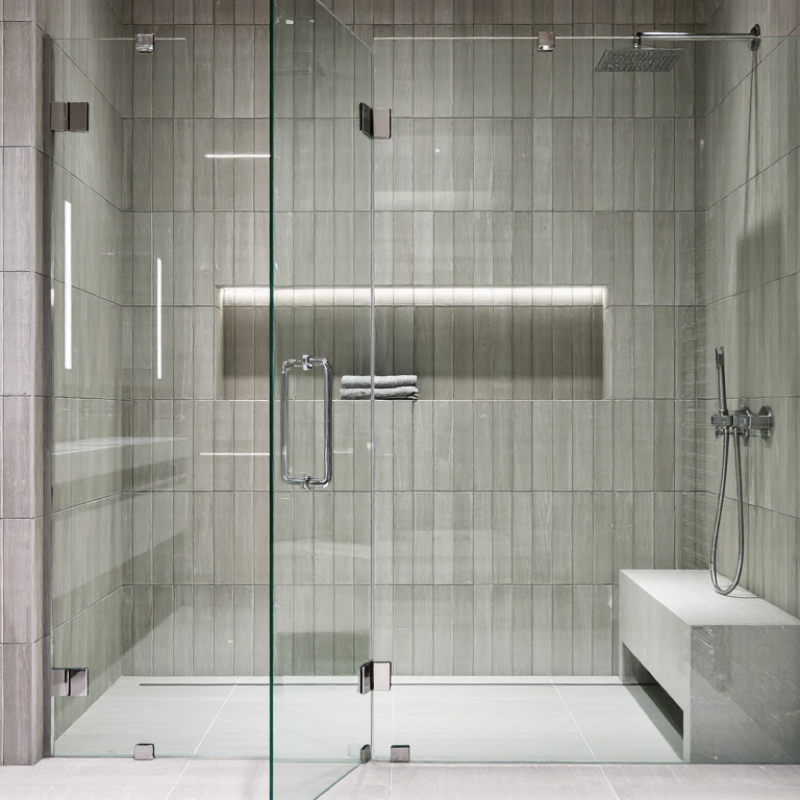
How to Choose the Right Hinged Shower Door?

Understanding Hinged Shower Door Types and Configurations

How to Choose the Right Hinged Shower Door?

Understanding Hinged Shower Door Types and Configurations

Start with the opening. A hinged door may suit an alcove shower, a corner enclosure, or a fixed glass panel beside a door. Measure the finished opening at the top, middle, and bottom; walls are not always perfectly square. Most side-hinged doors swing outward, so check nearby vanities, toilets, and towel bars. Some hardware permits an inward swing, but confirm the product’s specifications before planning around it. A layout can look spacious on paper and still feel awkward in daily use.

Door construction changes both appearance and upkeep. Framed models use metal around the glass and can help accommodate minor irregularities. Semi-frameless designs reduce visible framing while retaining support at selected edges. Frameless doors offer a cleaner sightline, but require compatible glass, precise installation, and sturdy attachment points. Configurations also vary: a single door works for many alcoves, while a door paired with a fixed panel can suit wider or corner openings. That extra panel needs regular cleaning, a small trade-off.

Tips: Stand where the door will swing and test the clearance with a tape measure. Check the threshold, handle position, and nearby fixtures. Ask an experienced installer to verify wall conditions and measurements; small errors matter. Don’t choose by appearance alone.

Measuring the Shower Opening and Checking Wall Conditions

Measure the finished shower opening, not the framing behind the tile. Record the width near the bottom, middle, and top, since walls can narrow or spread slightly. Use the smallest measurement when checking a door’s stated fit range. Measure the height from the curb to the planned top edge, and note where trim or a ceiling may interfere. Write every number down. Then check it again. A tape can bend, and a reading taken at an angle can be off by enough to complicate installation.

Check both walls with a level. A wall that leans can leave a hinged panel with uneven gaps or make the door swing poorly. Look closely at the hinge side: tile may hide the framing or reinforcement needed for secure fastening. Don’t assume an anchor alone will suit every wall; confirm the wall construction and follow the door’s installation instructions. Also check whether the curb is level and whether the open door will hit a vanity, towel bar, or toilet. It is easy to trust one neat measurement too much. I would rather measure twice and find an awkward corner early than force a poor fit later.

How to Choose the Right Hinged Shower Door? — Measuring the Shower Opening and Checking Wall Conditions

Check How to Measure or Inspect Example Record What to Confirm Before Choosing a Door
Opening width Measure between the finished wall surfaces at the top, middle, and bottom of the intended door opening. Keep the tape level and measure in inches or millimeters. Top: 60¼ in
Middle: 60 in
Bottom: 59¾ in
Give the door supplier all three measurements. The narrowest point is important, but the selected door must fit the specific product’s stated adjustment range.
Opening height Measure vertically from the finished threshold or curb to the planned top of the glass at the hinge side, center, and latch side. Hinge side: 72 in
Center: 72⅛ in
Latch side: 72 in
Check the available door height and required clearances against the manufacturer’s installation instructions. Measure from finished surfaces, not unfinished framing.
Wall plumb Place a level vertically against each wall where the hinges or fixed panel will attach. Note any gap or lean from top to bottom. Right wall: about ⅛ in out of plumb over 72 in Out-of-plumb walls can affect alignment and sealing. Confirm the door system’s permitted adjustment; significant irregularities may need correction before installation.
Wall flatness and corner angle Check for bowed tile, uneven grout lines, and whether the two walls meet at approximately 90 degrees. Use a straightedge and a square where practical. Tile surface: slight bow near lower hinge area Uneven surfaces can prevent a fixed panel or wall channel from sitting properly. Ask how the chosen system handles the measured conditions.
Hinge-side backing Determine what is behind the finished wall at the planned hinge locations. Review installation records or have the wall assembly checked before drilling. Backing location: not confirmed Hinges must be fastened to a suitable structural support according to the door instructions. Tile alone should not be assumed to provide adequate support.
Threshold or curb Measure the usable top width and check that the surface is stable and even. Observe whether the curb slopes toward the shower interior. Top width: 3½ in; surface: level across width Confirm that the hinge and glass base can be installed on the available surface and that the door design is compatible with the threshold configuration.
Door swing clearance Mark the proposed hinge position and trace the door’s swing arc. Check nearby toilets, vanities, towel bars, and room doors. Clear space outside shower: 28 in Verify that the door can open without hitting an obstruction and that its swing direction and clearance meet local requirements and the product instructions.
Finished surfaces and condition Take measurements after tile, wall panels, and the curb are complete. Check for loose tile, cracked grout, moisture damage, or movement. Surfaces: finished; tile: secure on inspection Door dimensions depend on the finished opening. Repair loose or damaged surfaces before installation and drilling.

Measurement note: Example readings are illustrative, not standard door sizes or installation tolerances. Door fit, adjustment ranges, fastening requirements, and local safety rules vary by product and location; verify them with the product instructions and a qualified installer.

Choosing the Right Door Size, Swing Direction, and Glass

A hinged shower door should fit the finished opening, not the rough measurements taken before tile is installed. Measure the width at the top, middle, and bottom; walls are not always perfectly square. Measure twice. Check the shower curb and nearby vanity, too. The door needs enough room to open without striking a toilet, towel bar, or person passing by. Follow the door’s installation specifications, since required clearances vary.

Choose the swing direction based on the room’s real traffic. An outward-opening door can make access easier, but it must not hit another fixture or block a walkway. Some layouts allow an inward-and-outward swing; others do not.

Stand where the door will open and imagine carrying a towel or helping a child step out. It sounds obvious, yet this small test is easy to skip.

Glass affects both privacy and the room’s feel. Clear glass keeps a compact bathroom visually open, while frosted or textured glass offers more privacy and can show water marks differently. Safety glass is essential; confirm the product meets applicable building requirements and suits the opening.

A protective coating may reduce cleaning effort, but it does not make glass maintenance-free. Hard water still leaves spots. Choose a finish you are willing to wipe down regularly.

Comparing Frame Materials, Hardware, and Safety Features

A hinged shower door should suit the room, not just the tile. Compare frame materials for moisture resistance, stiffness, and upkeep. Anodized aluminum is lightweight and commonly used around glass; stainless steel hardware can offer a sturdy feel, but still needs regular cleaning. Check joints and finishes closely. Water can collect there.

Hinges should match the door’s weight and the wall or glass mounting method. Confirm the door swings freely without striking a vanity, towel rail, or toilet. A tape measure and a cardboard swing template can reveal clearance problems before installation. Small details matter. Look for replaceable seals and a handle that feels secure with wet hands. I would not choose hardware by finish alone; that is an easy detail to overvalue.

For safety, select marked safety glazing that meets applicable local requirements, and follow the door maker’s installation guidance. Tempered glass is designed to break into smaller pieces, which can reduce injury risk, but it is not unbreakable. Check that the frame or wall can support the assembly, and inspect hinges for looseness over time. A low threshold may improve access, while a sound seal helps keep water off the bathroom floor. It is worth checking both against the room’s actual layout.

How to Choose the Right Hinged Shower Door?

Glass thickness affects the load that hinges and supporting hardware must carry.

Estimated glass mass per square metre: values are calculated using a glass density of approximately 2,500 kg/m³, so actual panel weights may vary. When comparing hinged doors, check that the hinges are rated for the panel’s weight, choose corrosion-resistant hardware suited to wet areas, and verify that the glass is certified safety glazing. Frame material and installation conditions also affect durability and suitability.

Evaluating Installation Needs, Maintenance, and Budget

A hinged shower door works best when the bathroom can accommodate its swing. Measure the opening at the top, middle, and bottom; walls are not always perfectly square. Check that the door clears the vanity, toilet, and towel rail. The glass and hardware need secure support, so confirm the wall structure and follow the installer’s requirements. A small measurement error can become an awkward daily problem.

Tips: Mark the door’s swing with painter’s tape before buying. Check for nearby fixtures, and ask how the threshold and wall edges will be sealed. Keep the glass-care instructions for later.

Compare the full installed cost, not just the door price. Include delivery, fitting, any wall adjustments, and replacement seals or hinges over time. Simple metal finishes and fewer crevices can make routine cleaning easier, though water spots still show on clear glass. Wipe the lower edge after showering and inspect seals periodically for gaps or wear. It is easy to focus on appearance and overlook maintenance; that trade-off deserves a second look. If the opening is unusually narrow or uneven, get a site measurement before committing to a model.