A broken window pane changes a room quickly. Cold air slips past the frame, rain can reach the sill, and sharp glass creates an immediate hazard. The right repair depends on more than the visible crack. Pane size, glass type, frame condition, and the window’s construction all matter. A careful inspection comes before any tool touches the glass.
There is an energy reason to take the damage seriously. The U.S. Department of Energy’s Energy Saver guidance estimates that windows account for about 25%–30% of residential heating and cooling energy use. That figure covers window-related heat gain and loss, not the savings from one pane repair. Still, it shows why a poor fit or damaged seal should not be ignored. The National Fenestration Rating Council also emphasizes comparing tested window performance ratings; those ratings can help identify when a pane-only fix may not address the larger problem.
This guide, Top 10 Tips for Replacing a Broken Window Pane, explains how to assess the damage, choose compatible glass, prepare the work area, and handle removal and installation with care. Wear eye protection and cut-resistant gloves. Glass is unforgiving. A small chip may be manageable, while a shattered pane, damaged frame, or sealed double-pane unit may call for a qualified glazier. I’ve learned that a repair can look tidy and still be wrong for the window. These practical checks help you decide whether to replace broken window pane yourself or seek professional help.
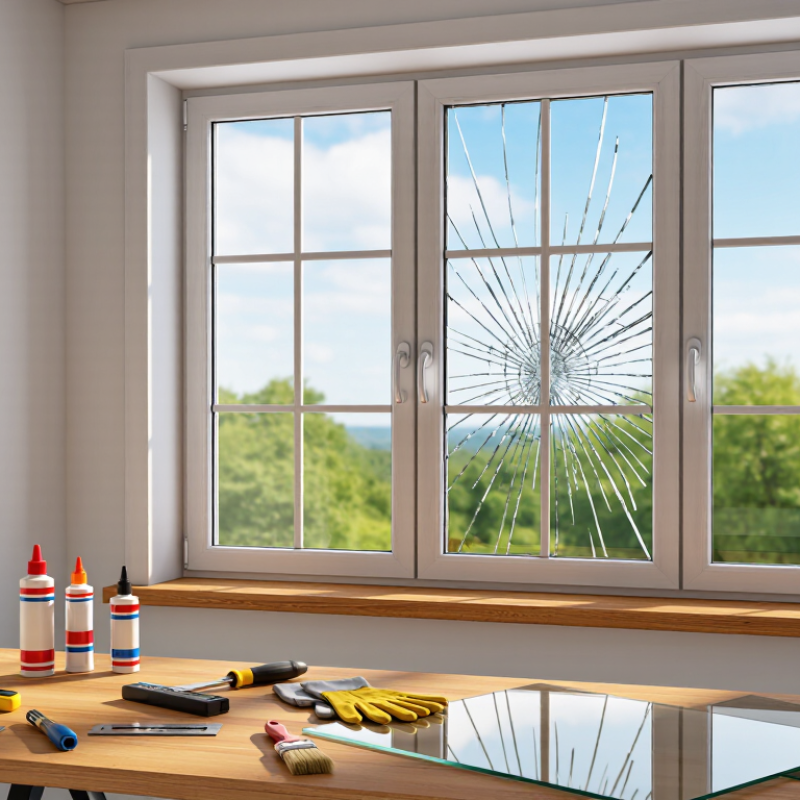
When a pane breaks, do not choose a replacement by thickness alone. Check the remaining glass for a permanent mark, often near a corner. It may identify the manufacturer, glass type, or compliance standard. Tempered and laminated glass can look similar once installed. Do not guess. If the marking is missing or unreadable, ask a qualified glazier to identify the material from its construction and location.
CPSC 16 CFR Part 1201 sets impact-performance requirements for covered architectural glazing materials. It includes Category I and Category II performance levels. The required level depends on the product and its intended use; nearby doors, low windows, and other impact-prone areas may also be governed by local building codes. Check both before ordering glass.
A label or product documentation can help confirm compliance, but an old pane’s mark may not tell the whole story. I would verify the replacement’s documentation rather than rely on appearance or a seller’s verbal assurance. Even careful checks can leave uncertainty when the frame hides the glass edge. In that case, pause and get an on-site assessment instead of fitting a pane that may not meet the applicable safety requirements.
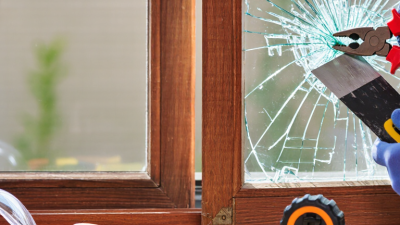
Before touching a broken pane, clear the floor and keep children and pets away. Wear safety glasses with side shields; ordinary prescription glasses leave gaps where flying glass can enter. CDC/NIOSH has reported that about 2,000 U.S. workers suffer job-related eye injuries requiring medical treatment each day. That figure covers many occupations, but it is a sobering reminder that small fragments can cause serious harm. For close work, sealed goggles may offer better coverage. Check the lenses for cracks, and keep them on while sweeping.
Choose snug, cut-resistant gloves with a documented cut rating suitable for glass handling. ANSI/ISEA 105 provides a recognized framework for evaluating glove cut resistance, but no glove makes sharp glass harmless. Inspect gloves for worn palms or torn seams before use. Keep fingers away from pane edges, and lift loose pieces slowly into a rigid container rather than a thin bag. Slow hands help. A sleeve covering the wrists adds another barrier, though it can snag if it hangs loose. It is easy to focus on the repair and rush this part; that is exactly when a shard on the sill can catch an unprotected hand.
Before ordering glass, measure the frame’s glazing channel, not just the visible opening. Use a steel tape and record the width and height at several points; older frames can be slightly out of square. Note the smallest measurements, then confirm the clearance needed for the glazing system you plan to use. Small gaps matter.
Check the channel depth as well. The pane must sit securely without being forced against the frame. Measure the old glass thickness with calipers if an intact edge is available. If the pane is shattered, avoid handling sharp pieces; a glazier can help identify the thickness from the frame or a safe sample. Measure twice.
Thickness is only part of the match. Look for markings on the remaining glass, and consider whether the original pane was tempered or laminated. A replacement with the wrong glass type may not be suitable for that location. If the frame is damaged, unusually deep, or hard to measure, pause before ordering. It is tempting to guess from a neighboring window, but its frame may differ by a few millimeters. Write down each measurement, the units, and the glass type before contacting a supplier or installer.
| # | Tip | What to Do | Useful Measurement or Check | Why It Matters |
|---|---|---|---|---|
| 1 | Make the area safe first | Wear safety glasses and cut-resistant gloves. Keep people away from the work area and remove loose shards carefully. | Do not handle broken glass with bare hands. | Broken glass can cause serious cuts, including small fragments that are difficult to see. |
| 2 | Identify the window construction | Check whether the opening contains a single pane, a sealed double-pane insulating glass unit, or safety glazing. | Look for two glass layers, a spacer between layers, or safety-glass markings. | Sealed insulating units and safety glass generally require a correctly specified replacement unit rather than a single loose pane. |
| 3 | Measure the visible opening | Measure the width and height of the opening where the glass sits, between the inner edges of the frame or glazing channel. | Record width and height separately; do not assume the opening is perfectly square. | The visible glass size may differ from the overall frame size. |
| 4 | Measure in three places | Take width measurements near the top, middle, and bottom, then height measurements near the left, center, and right. | Write down all six readings and note any variation. | Frames can be out of square or slightly uneven; multiple readings help reveal that. |
| 5 | Confirm the required glass size | Use the frame or glazing-system instructions to determine the required edge clearance and how much glass must sit under the glazing material. | Do not automatically order the exact visible-opening measurement; the proper deduction depends on the frame. | A pane that is too large may not fit, while one that is too small may not be properly supported or sealed. |
| 6 | Measure the original glass thickness | If it can be done safely, measure an intact edge with a caliper or thickness gauge. Otherwise, check the frame specifications or ask a glass professional to identify it. | Common nominal single-pane thicknesses include 3/32 in (about 2.4 mm), 1/8 in (about 3.2 mm), and 3/16 in (about 4.8 mm). | Thickness affects fit in the channel and compatibility with glazing points, gaskets, or stops. |
| 7 | Match thickness to the glazing system | Specify glass that matches the original thickness and is approved for the frame, gasket, and glazing method. Check the channel depth before ordering. | Compare the replacement thickness with the frame’s available glass space and retaining hardware. | Glass that is too thick or too thin may not seat, seal, or stay retained correctly. |
| 8 | Choose the appropriate glass type | Match any required safety-glazing specification. Tempered or laminated glass may be required in locations such as doors, certain low windows, or areas near walking surfaces. | Check applicable local building rules and the window’s existing markings before ordering. | Ordinary annealed glass is not a substitute where safety glazing is required. |
| 9 | Prepare the frame and glazing materials | Remove remaining glass and loose old glazing material. Clean the channel and inspect the frame for rot, corrosion, or damage before fitting the pane. | Use glazing points, glazing compound, or gaskets appropriate to the frame design. | A clean, sound frame helps the pane sit evenly and allows the glazing system to hold and seal it. |
| 10 | Test the fit before final glazing | Carefully place the pane into the opening and check that it sits evenly with the specified clearance before securing and sealing it. | The pane should not be forced, tightly wedged, or left unsupported at its edges. | A controlled test fit helps prevent edge damage and makes it easier to spot measurement or thickness mismatches. |
Put on cut-resistant gloves and safety glasses before handling the broken pane. Keep children and pets away, and lay a thick cloth beneath the work area to catch small shards. If the sash can be removed safely, place it flat on a stable surface. Work slowly. Lift loose glass with pliers, not bare fingers, and collect every fragment in a sturdy container. A few tiny pieces can hide in the frame.
Remove old glazing compound with a putty knife, easing it away in small sections. Gentle pressure matters; forcing a stubborn strip can gouge the wood or crack a sound corner. Pull out the metal glazing points with pliers, then brush the rabbet—the recessed ledge that supports the pane—clean of dust and glass crumbs. Check the corners for soft, dark, or crumbling wood. If the frame seems damaged, pause before fitting new glass; covering a weak spot will not fix it.
Scrape away loose paint and compound, but avoid cutting deeply into the frame. The rabbet should be clean, dry, and reasonably even so the new pane can sit flat. On older painted windows, suspect coatings may contain lead; avoid dry sanding and seek appropriate professional guidance before disturbing them. It is tempting to make the surface perfect. Usually, removing loose material is the safer goal.
Before setting the replacement pane, confirm it fits the opening with a little room for expansion. A tight fit can crack glass when the sash shifts. Remove dust and loose old compound from the rabbet, then apply a thin, even bed of glazing compound. Press the pane gently into place; it should sit flat, not rock. Secure it with glazing points spaced evenly along the frame. Keep points clear of the glass edge. Take your time.
Seal the perimeter with a smooth bead of compound, angled to shed water. A damp glazing knife can help shape the surface, but avoid pressing hard against the pane. Inspect each corner for gaps, uneven contact, or compound pulled away from the wood. Look across the glass from several angles. If it rattles or moves with light pressure, adjust the points before reinstalling the sash. Don’t force a sash into place; that can stress a fresh pane. Follow the compound maker’s curing instructions, since some materials need time before painting or exposure to weather. I’ve found that a neat bead can still hide a small gap, so check the edges closely. A little extra patience here may prevent water damage later.